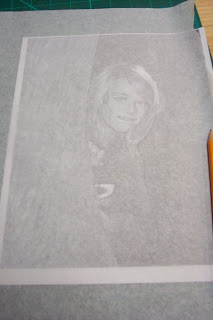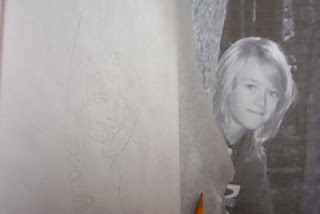
Choose a photo with high contrast. Enlarge it to the size you think you'd like to work with. It might be a good idea to make it larger than you think at first, and plan on making more than one. The first draft might be a throw away - use it as a learning experience! You might not be totally happy with your first try, but don't let that turn you off the
 process.
I usually photocopy it into gray scale at this point, as it makes the tracing step easier.
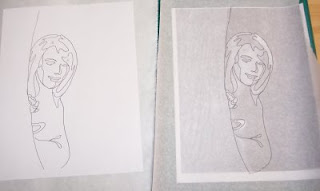
Use some tracing paper to trace your photo. Try to make shapes that enclose the light, medium and dark shapes. Don't try to be a great artist, don't bother trying to draw the picture the way you think it should look, just follow the edge of the different spaces. Trust me, it will work out.
Once you trace it, darken your trace with marker. Photocopy it once more onto regular paper.
Lay your tracing paper copy back on top of your photo. Use it as reference for the next step.

Look at the tracing paper - you can see the light, dark and medium shapes through the tracing paper layer. Mark a little notation on each of the shapes that you made (on the regular paper photocopy) as to whether you want to make the shape out of light, medium or dark fabric.
Once you have this 'key', keep it intact. Photocopy it once more on to freezer paper. It's important to make sure that those notations are on the freezer paper copy! The freezer paper copy is the one you need to cut apart, but not quite yet.
Go to your fabric collection and figure out what you want to do for your background. In the case of the photo above, I'll probably lay down a background piece for the right hand side, assemble all my portrait pieces on that, then add the left hand side (in the original photo, Oldest is peeking out from a large tree {Hi Mom!}). Adding the tree layer at the end will add to the illusion of depth.
Once you have your background piece figured out, you can start looking at your portrait again. Each of the shapes on your freezer paper copy should be marked either light, medium or dark. Again, it is the freezer paper copy that you can cut apart...save the plain paper copy for reference.
Go back to your fabric collection and pick out the fabrics you want to use. For portraits it's usually good to use mottled solids or solids in the skin areas, although there have been amazing successful portraits using wild and wonderful prints. If you're going for realism, use calm fabrics. If you're going for interpretive portraiture go for colour!
Looking at your photocopy, choose your lights, mediums and darks of each colour. I usually apply Steam-A-Seam2 (SAS2) to the back of any of the fabrics I think I'll use. Then you can cut apart your freezer paper copy, iron the freezer paper waxy side down on to the right side of your portrait fabric. - Don't forget to keep the paper backing on your SAS2, or you'll have ironed your portrait fabric to your ironing board (ask me how I know...)!
Cut out your portrait fabric around the freezer paper shapes. Remove the paper backing and freezer paper. Once you have everything cut out, go back over to your background fabric and start laying your pieces down. If you're having trouble getting it all to make sense, take your tracing paper copy and lay it on top of your work. You should be able to see through the tracing paper and figure out what pieces are not quite in the right place. - By the way, don't do this next to an open window - any light breeze at this point will blow all your work on to the floor!
Nudge all your pieces into their right place, stand back and decide if the colours work the way you wanted them to. This is your last chance to change your fabrics! If you want to replace any of the colours, go ahead and do it.
Once everything is the way you want it, grab a Teflon pressing sheet or a large piece of SAS2 backing paper. Gently place it on top of your assembled portrait, then (following the SAS2 manufacturer's directions), press everything to fuse it. This step is permanent. Once things are fused, you can not change them... this is why it's nice to start two at the same time.
Now that your fabrics are all together, embellish, embroider and quilt at will! Have fun with this. If you have any questions about it, you can email me privately and I'll be happy to help straighten things out. If you use my method, please send me a photo of your finished quilt! I'd really love to see it!
Most of all, have fun.
Happy stitching,
Lisa

3 comments:
I liked reading about your process on how to paper piece this quilt....I will put it in the back of my mind for another time....at the moment, I am scrap quilting! But this is great!
cheers
nicole
wow - what a great tutorial - thanks for sharing w us. I have had a self portrait in the back of my mind awhile now and I think I will try your method.. Pam P
Thanks - have fun with it! Let me know how any projects go, I'd love to see what you do with this.
:)
Post a Comment